Using the Angular CLI to set up an Angular 2 project
Angular 2 is a powerful javascript framework and you can do some amazing things with it. It is better optimized and responsive than Angularjs 1.X.
So now you are all ready to go. All ready to dive feet first into Angular 2 but here is the challenge, where do you start?
Angular 2 has a more in depth project set up than Angularjs 1. You can't just load a few libraries and go. Fear not, there are several ways to kick start your first project.
You can search GitHub and find some start up projects, check out the starter files by Deborah Kurata, or you can use the Angular CLI to generate your start up project. So let's walk through using the CLI.

 From here click on the "Get Started" button which will take you to the Angular CLI GitHub repository.
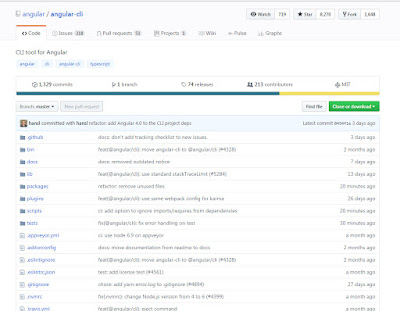
You can either clone or download the source files in a zip file (depending on your preferences). You don't need these files to set up your first project but they are good to have in case you screw up a file and need to get it back from the source.
Once you have the files downloaded, go to your Node.JS directory and launch the Node.JS Command Prompt.
To set up the CLI, go to your Node.JS command prompt and type npm install -g @angular/cli.

This will install the Angular CLI. This may take a while and might throw a couple of errors but as long as it says that it completed successfully, then you are good.

This will run for quite some time depending on your processing speed but once it is done, it should look like this:

Ok, so now we have to be ready to go, right? Well, kinda. Before we launch the app for the first time there are a couple things I recommend. These are completely optional and if you don't want to do them. skip them and to start to the project launch.
First, I recommend you download Visual Studio Code. It is a nice FREE editor that works well with Angular 2 and Typescript. Again, you can use any editor, I just prefer this one for its' usability. To get Visual Studio Code go to: Code.VisualStudio.com and download the editor.

Once you have either Visual Studio Code or your preferred editor downloaded and installed open the folder where you built your project (in my case C:\web\BaseApp). At the root of your application you will find a file package.json.js . This is the file that tells Angular 2 which packages need to be loaded. If you open the file, it looks something like this:

We will look at this and some of the other base files in another post but for now, we will add another package to the package.json.js file.
In the dependencies section, add "bootstrap": "^3.3.6". This will tell Angular to load bootstrap as one of its' packages. Again you don't have to do this but I highly recommend this if you are going to do some heavy UI design. Be sure to save the file and close the editor.

What if you don't want to use port 4200? Easy enough, just change the command to "ng serve --host 0.0.0.0 --port 4201". With this command you can change the host IP address or the port.

Once this has executed, you should see the following:

This means your project is served up to whichever host and port you defined (by default localhost:4200).
So let's check it out. Open the browser to your host and port and you should see:

Granted, not hugely exciting but hey, it's compiled and there. So congratulations, you have set up your first Angular 2 project with the Angular CLI.
Next time we will look at the base files generated by the CLI and see what they do.
Catch you later,
Allen
So now you are all ready to go. All ready to dive feet first into Angular 2 but here is the challenge, where do you start?
Angular 2 has a more in depth project set up than Angularjs 1. You can't just load a few libraries and go. Fear not, there are several ways to kick start your first project.
You can search GitHub and find some start up projects, check out the starter files by Deborah Kurata, or you can use the Angular CLI to generate your start up project. So let's walk through using the CLI.
Prerequisites
Before we start using the Angular 2 CLI, you must have Node.JS and the Node Package Manage. You don't have them installed, you can go to https://www.npmjs.com/ and download it.
Angular CLI
This will allow you to run the Angular 2 CLI and import and unpack the packages. Next, go to https://cli.angular.io/ this will take you to the Angular 2 CLI home page.

You can either clone or download the source files in a zip file (depending on your preferences). You don't need these files to set up your first project but they are good to have in case you screw up a file and need to get it back from the source.
Once you have the files downloaded, go to your Node.JS directory and launch the Node.JS Command Prompt.
CLI Installation
Once the prompt is open, we will install the Angular CLI. Please note, you only have to set up the CLI once, after that you can just create projects.To set up the CLI, go to your Node.JS command prompt and type npm install -g @angular/cli.

This will install the Angular CLI. This may take a while and might throw a couple of errors but as long as it says that it completed successfully, then you are good.
Project Setup
So now you have the CLI, are we ready to do some Angular 2 coding? Nope. We still need to create a project. To do that, go back to the Node.JS Command prompt and change the directory to where you want to set the new Angular 2 project up (in my case, it's C:\web). After you are there, type the following: ng new //Project.Name// where //Project.Name// is your project name (in my case it's BaseApp).
This will run for quite some time depending on your processing speed but once it is done, it should look like this:

Ok, so now we have to be ready to go, right? Well, kinda. Before we launch the app for the first time there are a couple things I recommend. These are completely optional and if you don't want to do them. skip them and to start to the project launch.
Optional
Here are a few things that will help you with your project, depending on your needs these may or may not be helpful.First, I recommend you download Visual Studio Code. It is a nice FREE editor that works well with Angular 2 and Typescript. Again, you can use any editor, I just prefer this one for its' usability. To get Visual Studio Code go to: Code.VisualStudio.com and download the editor.

Once you have either Visual Studio Code or your preferred editor downloaded and installed open the folder where you built your project (in my case C:\web\BaseApp). At the root of your application you will find a file package.json.js . This is the file that tells Angular 2 which packages need to be loaded. If you open the file, it looks something like this:

We will look at this and some of the other base files in another post but for now, we will add another package to the package.json.js file.
In the dependencies section, add "bootstrap": "^3.3.6". This will tell Angular to load bootstrap as one of its' packages. Again you don't have to do this but I highly recommend this if you are going to do some heavy UI design. Be sure to save the file and close the editor.

Project Launch
Ok, now we are ready to launch our project for the first time. To do that go back to the Node.js Command Prompt and type "ng serve". This will compile your project and launch it at its' default website Localhost:4200.What if you don't want to use port 4200? Easy enough, just change the command to "ng serve --host 0.0.0.0 --port 4201". With this command you can change the host IP address or the port.

Once this has executed, you should see the following:

This means your project is served up to whichever host and port you defined (by default localhost:4200).
So let's check it out. Open the browser to your host and port and you should see:

Granted, not hugely exciting but hey, it's compiled and there. So congratulations, you have set up your first Angular 2 project with the Angular CLI.
Next time we will look at the base files generated by the CLI and see what they do.
Catch you later,
Allen


Comments
Post a Comment